Hey there! I'm a supplier of rigid pipe supports, and today I'm gonna walk you through the process of installing a rigid pipe support for plastic pipes. It might seem a bit tricky at first, but with the right steps and a bit of know - how, you'll get it done in no time.
Why Use Rigid Pipe Supports for Plastic Pipes?
First off, let's talk about why you need rigid pipe supports for your plastic pipes. Plastic pipes are great because they're lightweight, corrosion - resistant, and easy to work with. But they can't support their own weight over long distances. Rigid pipe supports help distribute the weight of the pipe and the fluid inside it evenly. This prevents sagging, which can lead to blockages, leaks, and even pipe failure. So, investing in good - quality rigid pipe supports is a no - brainer if you want your plastic pipe system to last.


Tools and Materials You'll Need
Before you start the installation, make sure you've got all the necessary tools and materials. Here's a quick list:
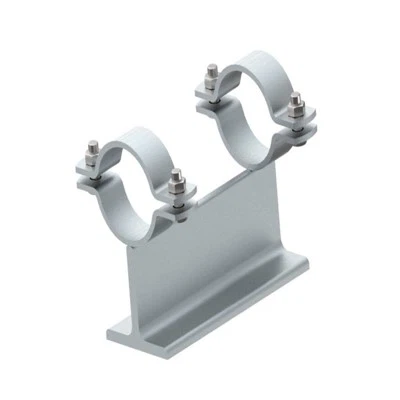
- Rigid pipe supports: You can choose from different types like Pipe Saddle Support, T - Type Pipe Supports with Clamp, or T - Type Pipe Support with Wear Pad. The type you pick depends on your specific application.
- Measuring tape: To measure the length of the pipe and the spacing between the supports.
- Drill and drill bits: If you need to drill holes for mounting the supports.
- Screwdrivers or wrenches: For tightening the bolts and nuts.
- Level: To ensure the pipes are installed straight.
Step 1: Plan the Installation
The first step is to plan where you'll place the rigid pipe supports. You need to consider the type of plastic pipe, the fluid it'll carry, and the distance between the supports. As a general rule, for small - diameter plastic pipes (less than 2 inches), you can space the supports about 3 to 4 feet apart. For larger - diameter pipes, you might need to reduce the spacing to 2 to 3 feet.
Use your measuring tape to mark the positions on the wall or the structure where you'll install the supports. Make sure the marks are level using your level. This will help ensure that the pipes are installed straight and that the weight is distributed evenly.
Step 2: Prepare the Mounting Surface
Once you've marked the positions, it's time to prepare the mounting surface. If you're mounting the supports on a wall, make sure the wall is clean and free of any debris. If it's a concrete wall, you might need to use a hammer drill to create holes for the anchors. For wooden surfaces, you can usually just drill pilot holes and then screw in the supports.
Step 3: Install the Rigid Pipe Supports
Now comes the fun part - installing the supports. Take your chosen rigid pipe support and align it with the marks you made earlier. If it's a Pipe Saddle Support, place it under the pipe and secure it to the mounting surface using bolts and nuts. Tighten the bolts just enough so that the support is firmly in place, but don't over - tighten as it could damage the support or the pipe.
If you're using T - Type Pipe Supports with Clamp, wrap the clamp around the pipe and then attach the support to the mounting surface. Again, use your screwdriver or wrench to tighten the bolts.
For T - Type Pipe Support with Wear Pad, make sure the wear pad is in contact with the pipe. This helps reduce friction and wear on the pipe surface.
Step 4: Check the Alignment
After installing the supports, double - check the alignment of the pipes. Use your level to make sure the pipes are straight. If you notice any misalignment, adjust the supports accordingly. You might need to loosen the bolts slightly, re - position the support, and then tighten the bolts again.
Step 5: Inspect the Installation
Once you've installed all the supports and checked the alignment, it's time to do a final inspection. Look for any signs of damage to the supports or the pipes. Make sure all the bolts are tightened properly and that there are no loose parts.
Tips and Tricks
- Don't overtighten: As I mentioned earlier, overtightening the bolts can damage the supports and the pipes. Use a torque wrench if you're unsure about the right amount of tightening.
- Use the right type of support: Different applications require different types of supports. Make sure you choose the one that's best suited for your plastic pipes and the environment they'll be in.
- Regular maintenance: Even after a successful installation, it's important to regularly inspect the supports for any signs of wear or damage. Replace any damaged supports immediately to prevent pipe failure.
Wrapping Up
Installing a rigid pipe support for plastic pipes isn't as hard as it might seem. By following these steps and using the right tools and materials, you can ensure a successful installation. And if you're in the market for high - quality rigid pipe supports, we've got you covered. Whether you need Pipe Saddle Support, T - Type Pipe Supports with Clamp, or T - Type Pipe Support with Wear Pad, we have a wide range of options to meet your needs.
If you have any questions about our products or the installation process, don't hesitate to reach out. We're here to help you make the right choice for your pipe support needs. Let's start a conversation about your project and find the perfect solution together.
References
- Pipe Installation Handbook
- Plastic Pipe Manufacturer's Guidelines